1. Log in to your control panel using the credentials sent to your email.

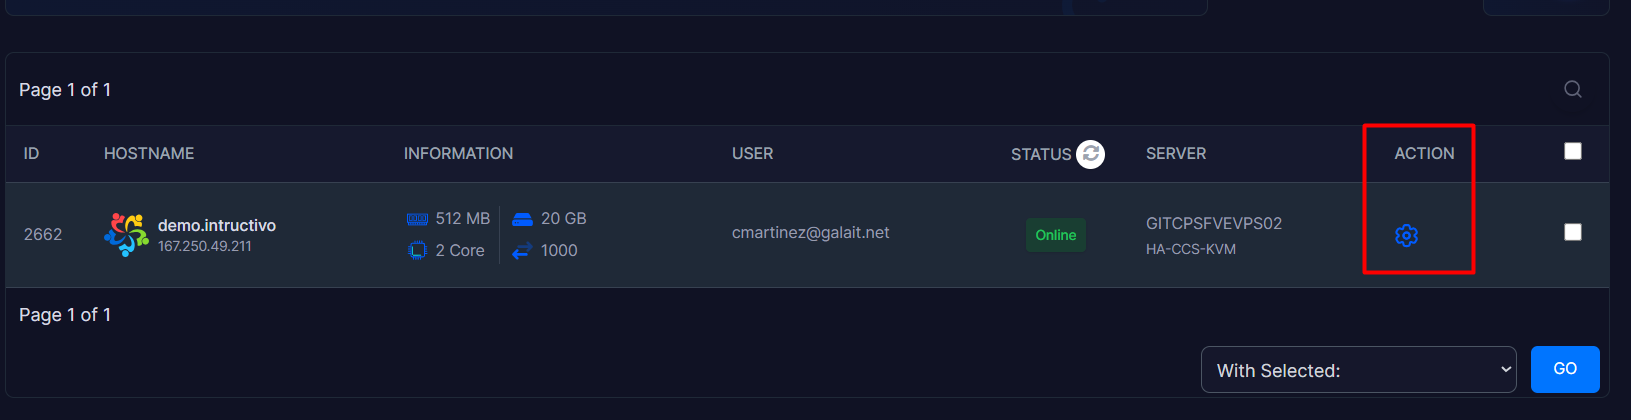
2. Once inside your panel, locate the Action module and click on the gear icon to access the administration panel.
3. Go to the Setting option, and in the first displayed module (Change), proceed to type your new VPS Hostname.
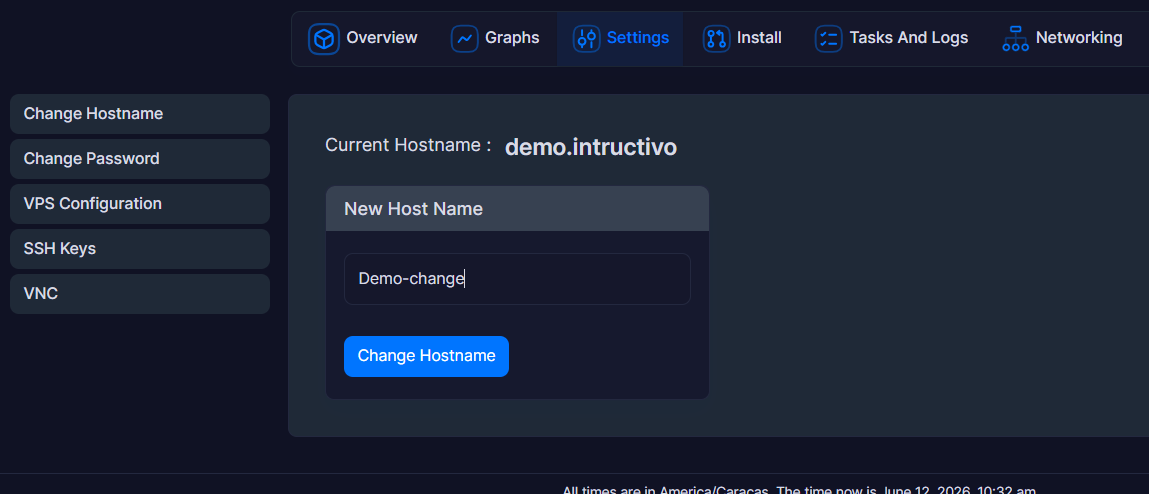
4. Once you have entered the new name, save the changes by clicking on the Change Hostname button.
Notes:
• Recommended format: It is advisable to use a Fully Qualified Domain Name (FQDN) structure, such as :// yourcompany.com.
• Avoid temporary console changes: We recommend not making this change directly via SSH commands (such as hostnamectl). Upon rebooting the server, Virtualizor will overwrite the console configuration with the data saved in the web panel. The web method is the only one that guarantees a permanent change.
• Application time: The process takes less than a minute, but please remember that services hosted on the VPS might experience a brief interruption of a few seconds while the server reboots.
• Synchronization reboot: For your server's operating system to adopt the new name internally and definitively, please perform a Reboot of the VPS using the control buttons on the web panel.
