Unlike other plugins, WPvivid stands out in its free version by offering two critical features: task automation and a direct connection to cloud storage services. This ensures your backups remain secure outside of your traditional web server.
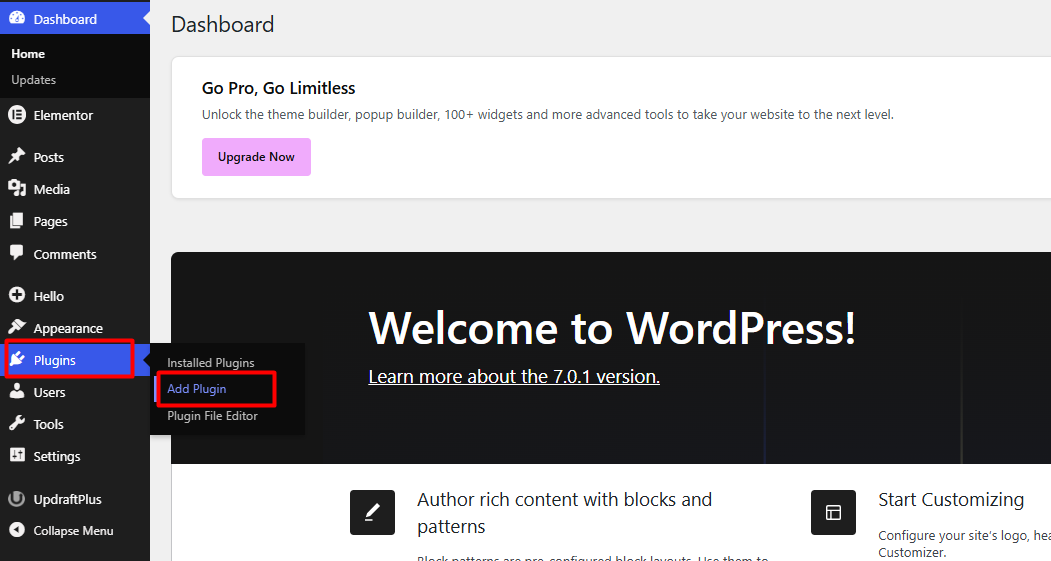
1. Log in to your WordPress admin dashboard.
2. Navigate the sidebar menu to Plugins > Add New Plugin.
3. In the dedicated search bar, enter the term :WPvivid

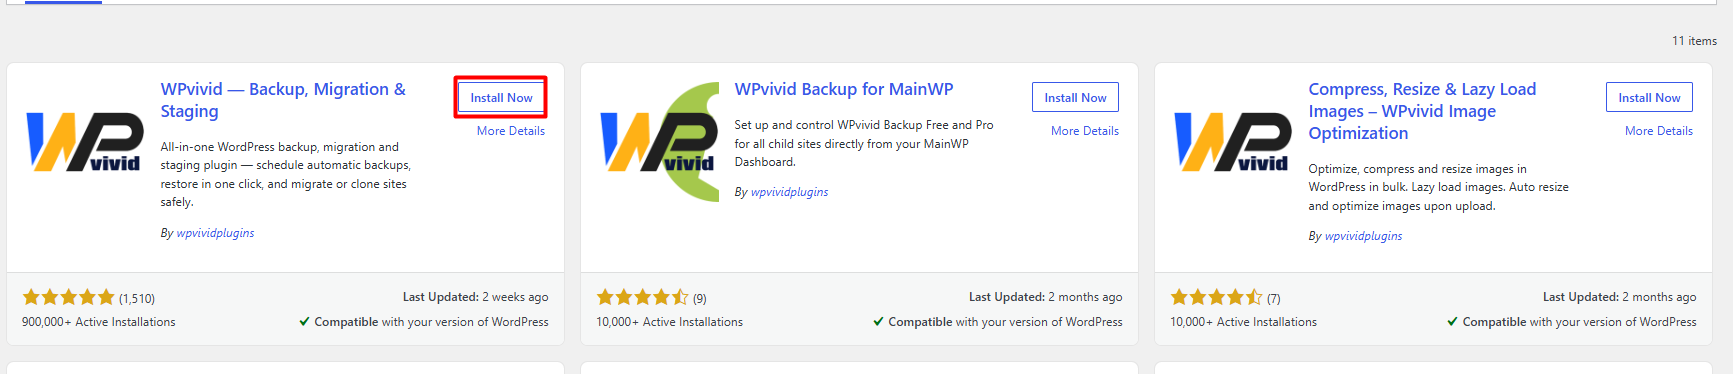
4. Locate the plugin named Migration, Backup, Staging - WPvivid
5. Click Install Now and immediately after, press Activate.

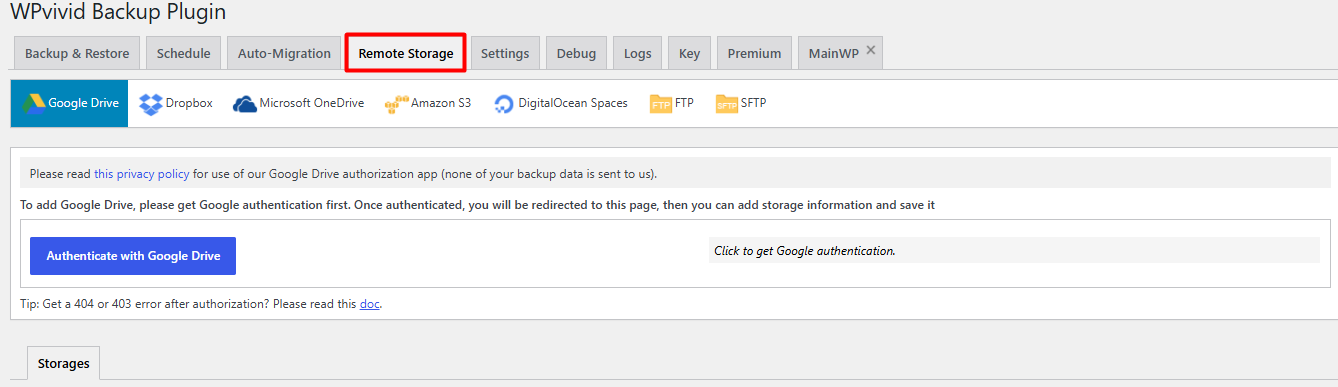
6. To comply with digital security best practices, the first strategic step is linking the plugin to an external storage service:
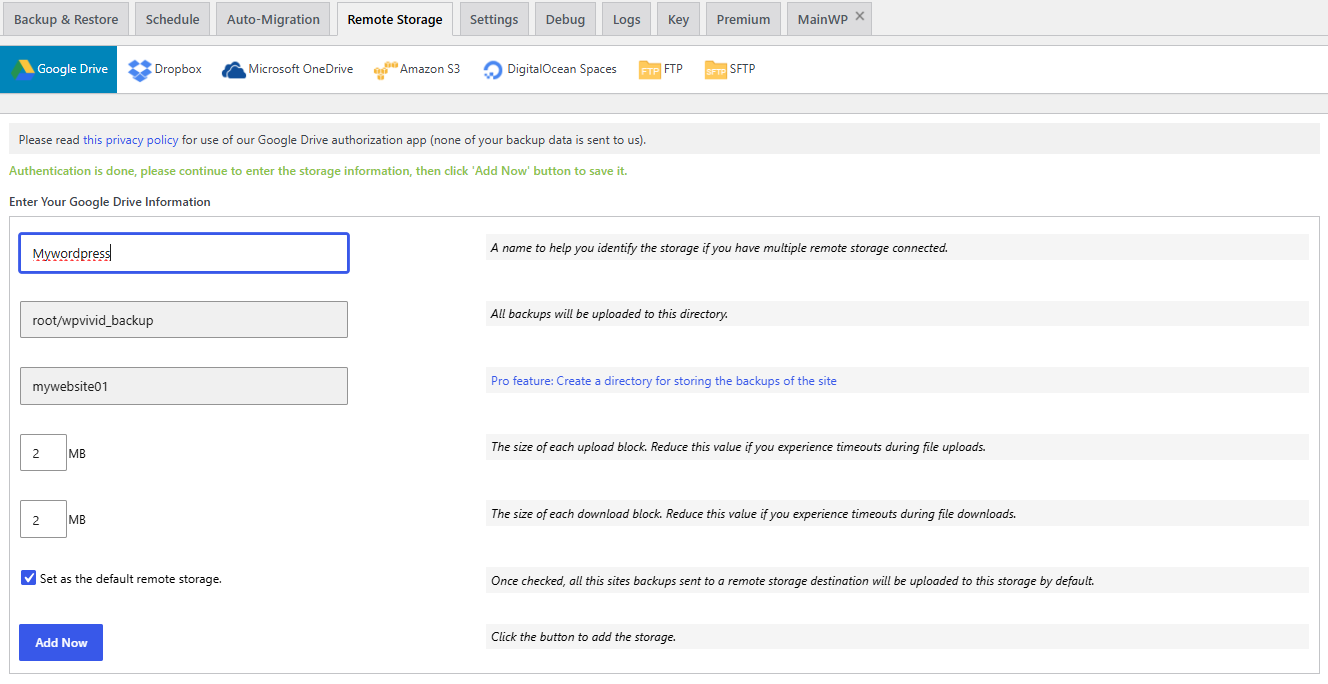
6.1. Head over to the top tab named Remote Storage.
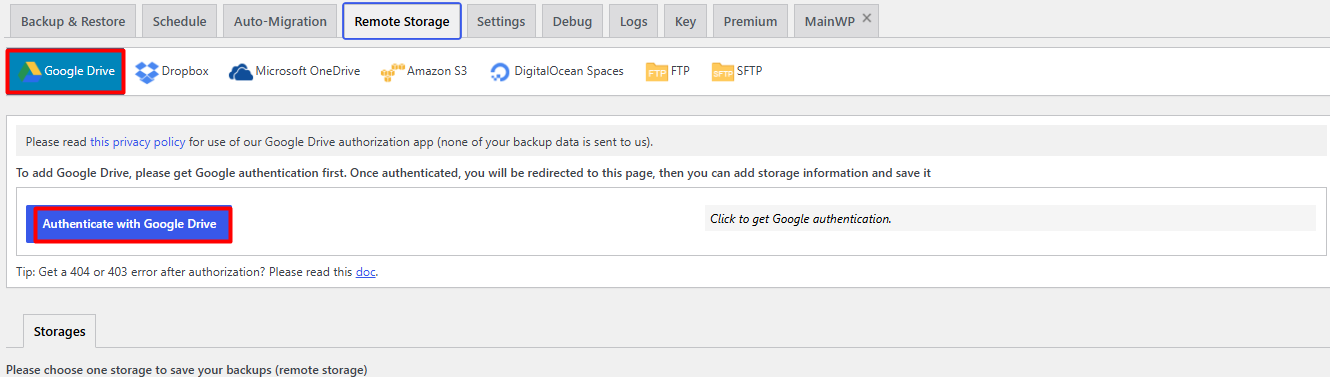
6.2. Select your preferred provider (example, Google Drive, Dropbox, or OneDrive).
6.3. Assign an unidentifiable custom name to the storage alias (Example, My Cloud Backup)
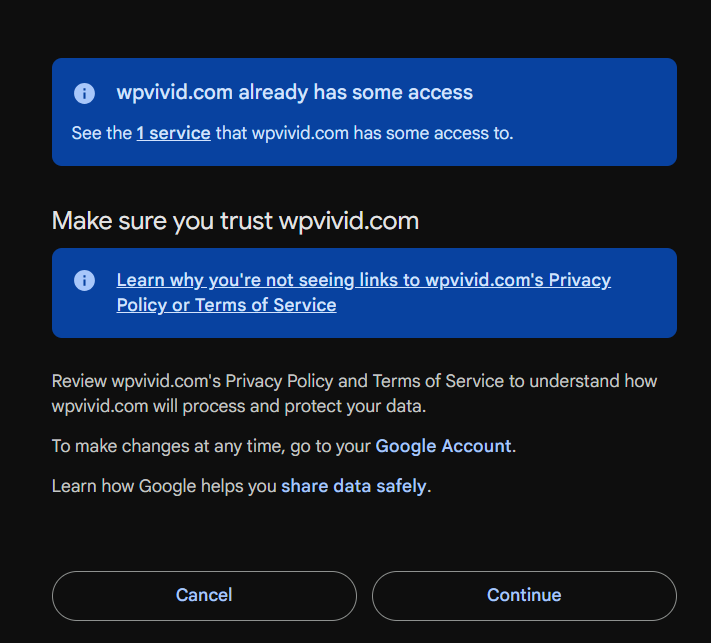
6.4. Click the Authenticate button. The system will redirect you to a secure window from your provider to grant access permissions
7. Now you can proceed to configure the task schedule to run your backup automatically:
7.1. Switch to the Schedule tab.
7.2. Check the box Enable backup schedule.

8. Select the frequency based on how often your content is updated:
8.1. Corporate websites or stable blogs: Weekly.
8.2. Online stores or news portals: Daily.
8.3. Backup Type: Choose Database + Files for comprehensive protection.
8.4. Crucially select Send backups to remote storage.
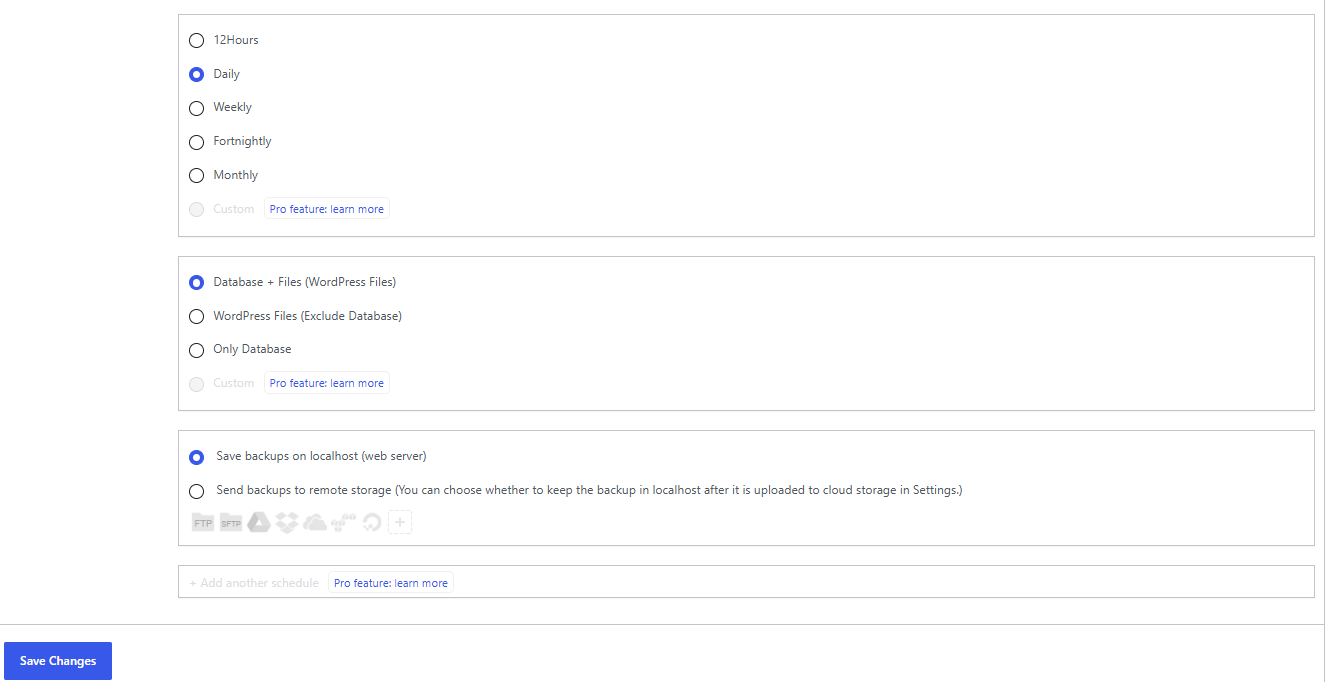
9. ClickSave Changes.
10. Go back to the main Backup & Restore tab.
10.1. In the central section, make sure to check the Database + Files option.
10.2. Select the Send backups to remote storage radio button.
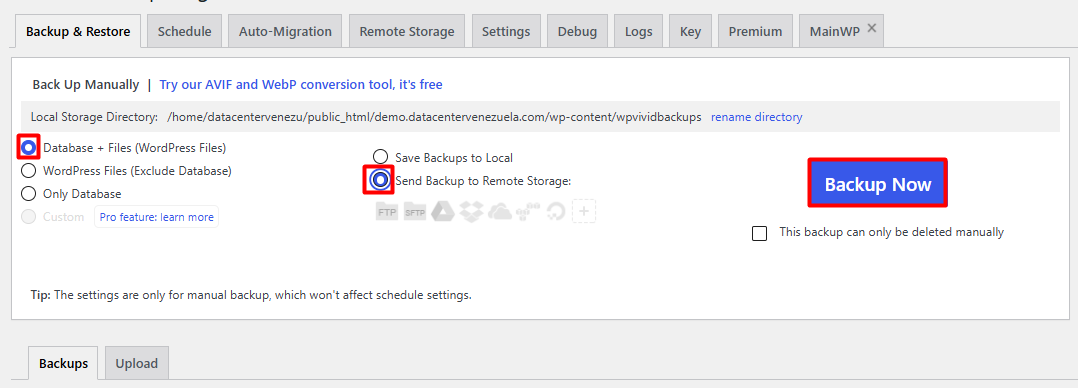
11. Press the main Backup Now button.