


1. Access your WHM control panel using your Administrator or Reseller credentials.
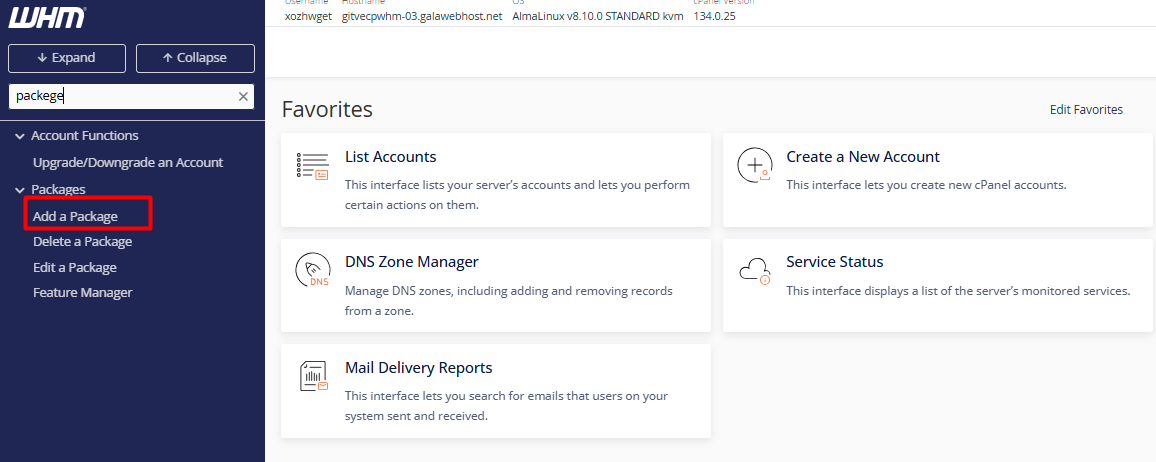
2. Use the search bar in the left sidebar menu and type "Packages." Select the option "Add a Package."
3. Assign a descriptive name (example ., Plus_Corporate). (Note: It is recommended to avoid spaces or special characters.)

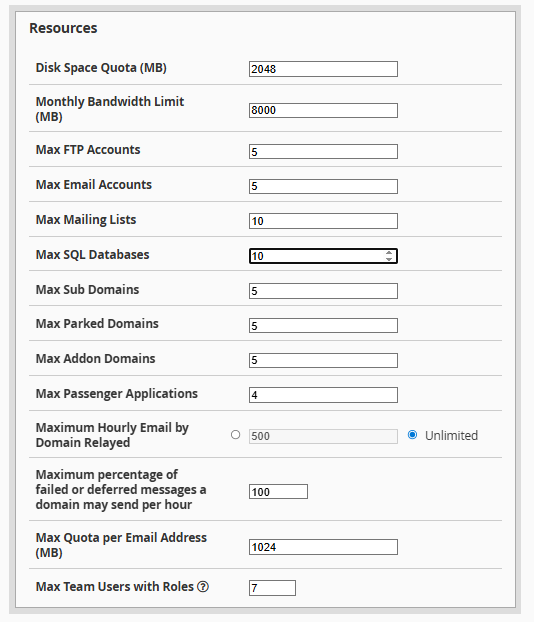
4. Resource Allocation: Define the technical limits according to your business strategy:
4.1. Disk Quota (MB): Total storage capacity.
4.2. Bandwidth (MB): Monthly data transfer limit.
4.3. FTP and Email Accounts: Number of remote access accounts and mailboxes allowed.
4.4. MySQL Databases: Number of databases available for applications like WordPress.
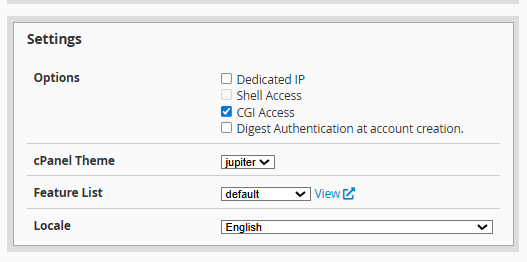
4.5. Customization and Security: Select the default cPanel language and set the hourly outgoing email limit to protect your IP reputation (Spam prevention).
Click the "Add" button. The system will confirm the successful creation of the package, making it available to be assigned to new or existing accounts.

