Efficient administration of your media library is essential for ensuring optimal performance and a consistent visual experience. Follow this workflow to manage your assets:
1.Uploading Multimedia Assets:
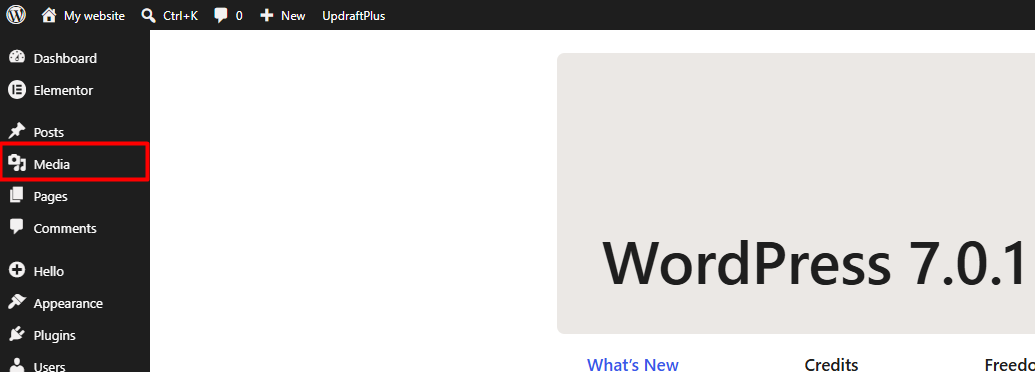
1.1. Navigate to the administrative dashboard's sidebar and select the Media section.
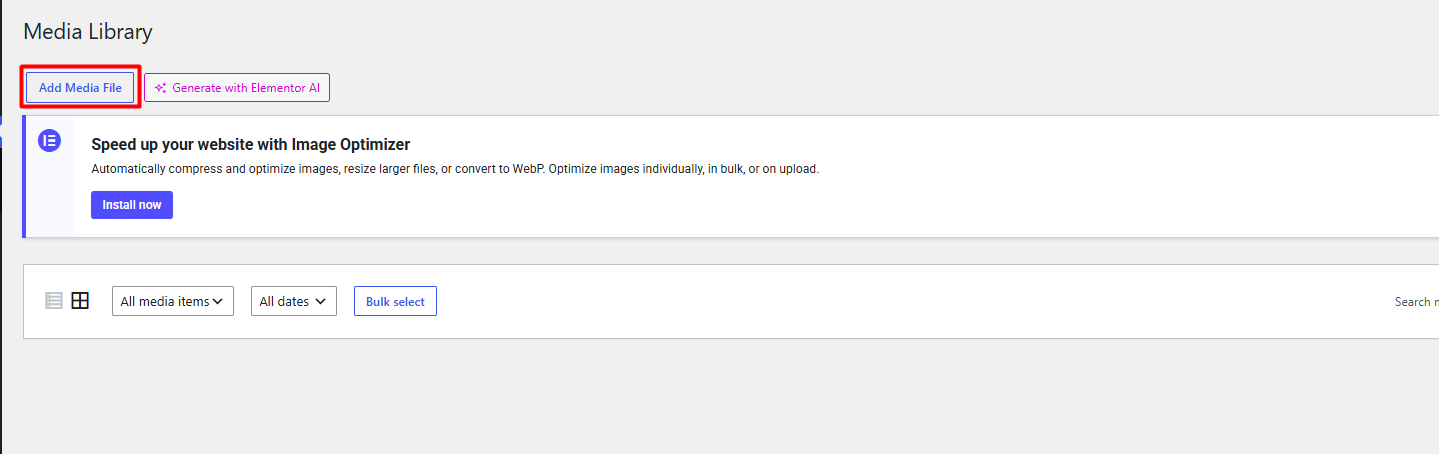
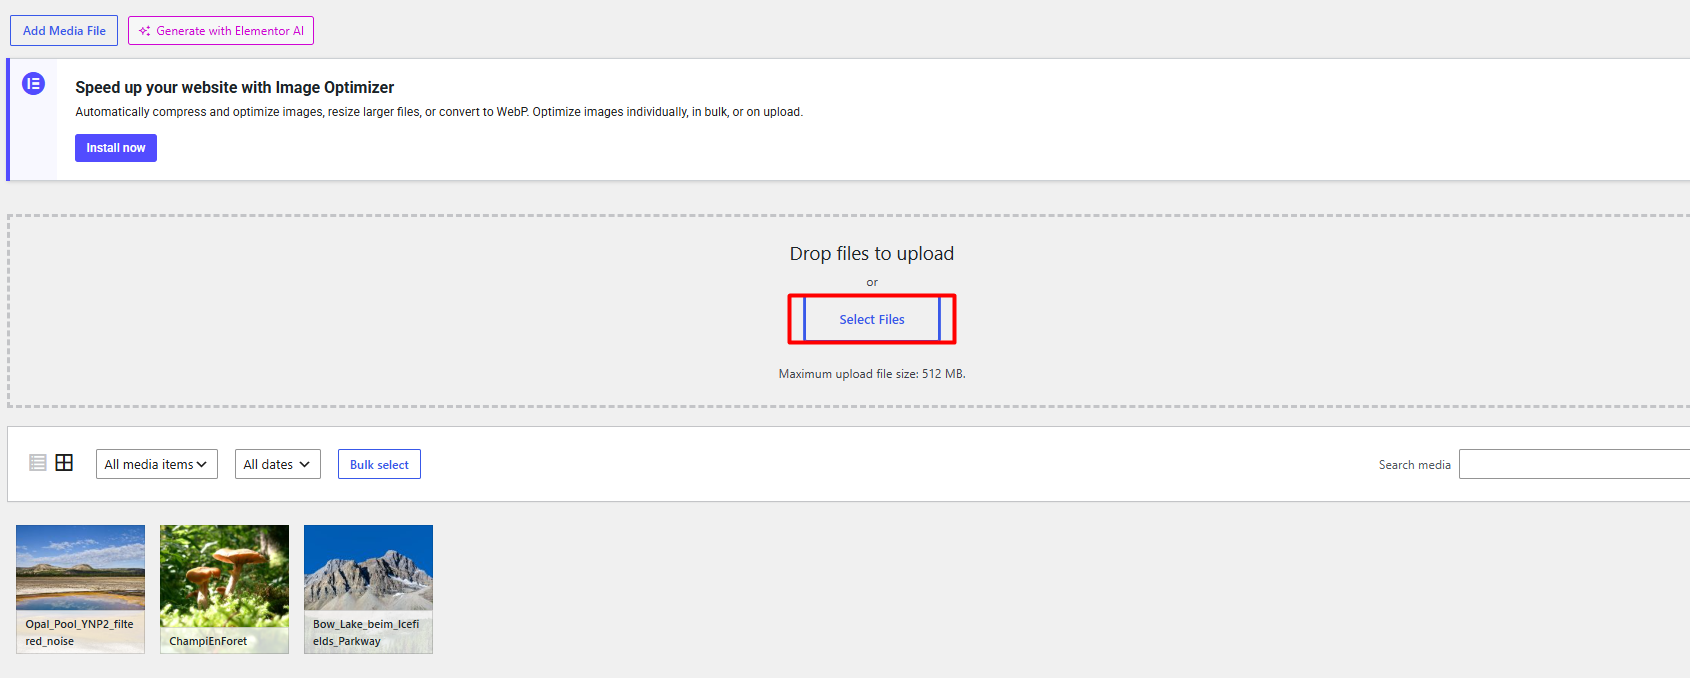
1.2. Click the Add New button. You may drag and drop your files (images, documents, or video files) directly into the designated area or use the Select Files option to browse your workstation's local storage
1.3. Once selected, the system will automatically upload and organize the files within your library. For superior performance, we recommend utilizing optimized formats (such as WebP or compressed images) prior to uploading.
2. Editing and Optimizing Files
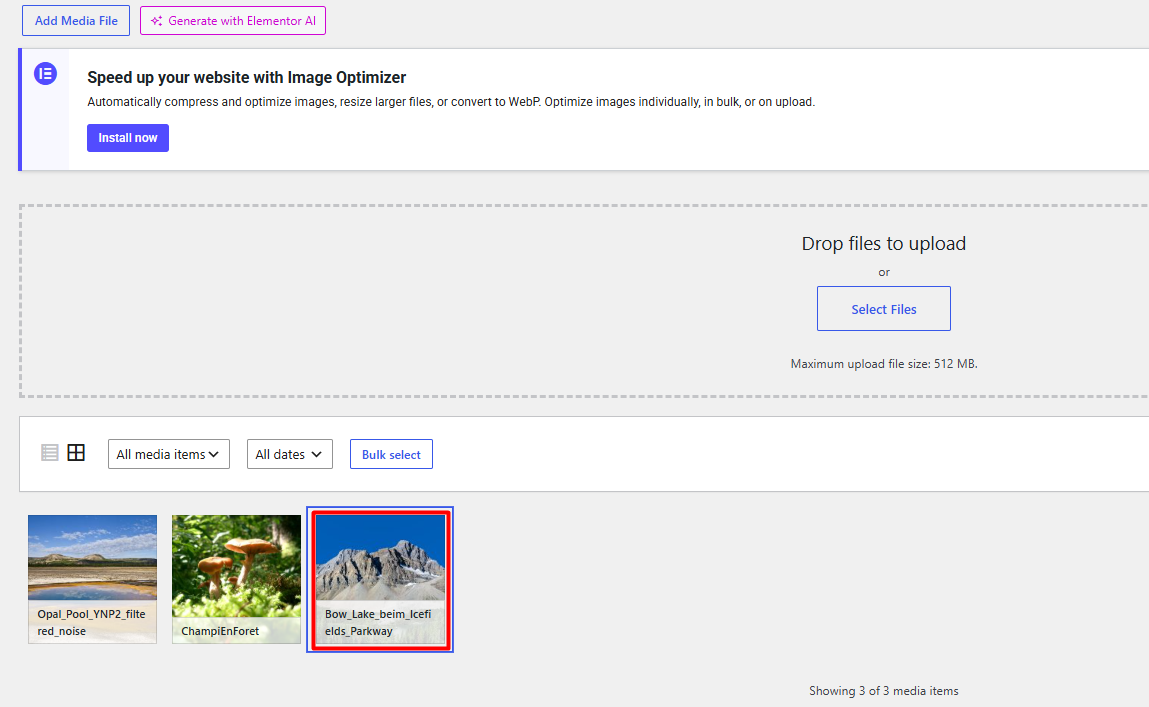
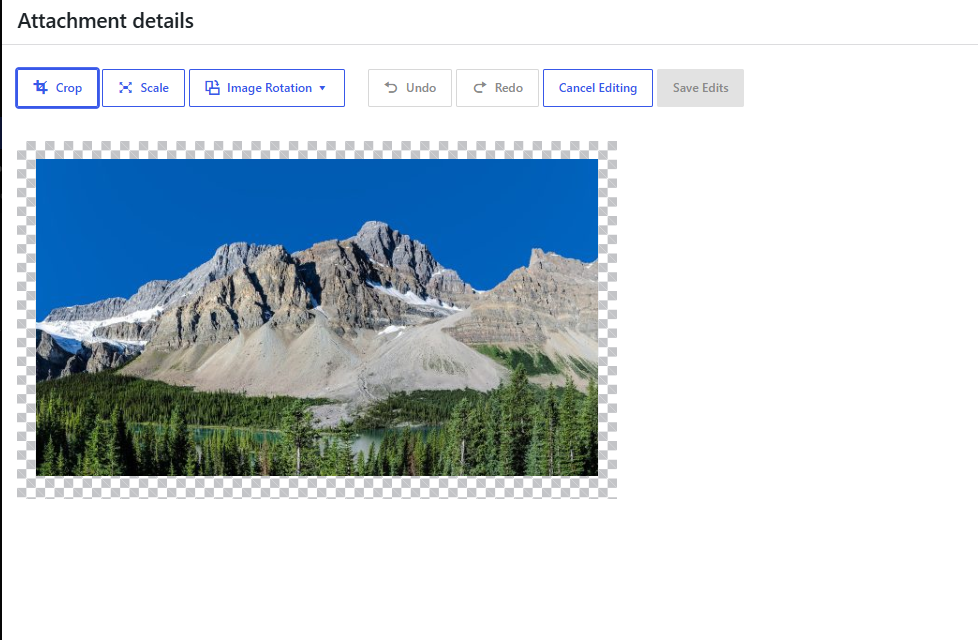
2.1. Within the Media Library, select the desired file and access the Edit Image button.
2.2. The editor allows you to perform fundamental actions such as rotating, cropping, scaling, or flipping your images. After applying your adjustments, confirm the changes by clicking Save.
2.3. Utilize the details panel to configure the Alt Text, title, and technical description for each file, thereby optimizing accessibility and your site's SEO positioning.
Notes:
• Avoid uploading files that exceed resolution or size requirements. Using optimized assets prevents excessive disk usage and significantly reduces page load times.
• If you need to replace an image while maintaining the same original URL, we recommend utilizing specialized tools such as Enable Media Replace. This ensures that no broken links are generated within your existing content.
• Before performing mass edits or critical changes to the library, we suggest verifying the availability of a recent backup of your assets.
• Always validate the origin of your multimedia files, especially in the case of attachments, to mitigate any risk of vulnerability within the server infrastructure.